Learn how to navigate Holidex, a decentralized exchange (DEX), with this step-by-step guide. Discover how to swap tokens, add liquidity, and earn rewards in the alpha version of Holidex.
Introduction to Holidex
Decentralized exchanges (DEXs) are revolutionizing the way we trade cryptocurrencies, offering users more control over their assets without relying on intermediaries. Holidex is one such platform that allows users to swap tokens and participate in Holidex liquidity pool powered by Holiverse to earn passive income.
In this guide, we’ll walk you through the basics of using Holidex, from connecting your wallet to swapping tokens and adding liquidity. Whether you’re a crypto newbie or a seasoned trader, this tutorial will help you get started with Holidex.
What is Holidex?

Holidex is a decentralized exchange currently in its alpha version. As with any alpha release, users may encounter bugs or display issues. If you experience any problems, Holidex encourages you to contact their technical support team or use their chat feature for assistance.
Despite being in its early stages, Holidex offers robust features like token swap and liquidity pool, making it a promising platform for crypto enthusiasts.
Step 1: Connecting Your Wallet to Holidex
Before you can start trading on Holidex, you’ll need to connect your cryptocurrency wallet. Here’s how:
- Click on the “Connect Wallet” button on the Holidex interface.
- Select your preferred wallet. For this tutorial, we’ll use MetaMask.
- Once connected, your wallet address and balance will be displayed on the screen.
Connecting your wallet is a crucial first step, as it allows you to interact with the DEX and manage your funds securely.
Step 2: Swapping Tokens on Holidex
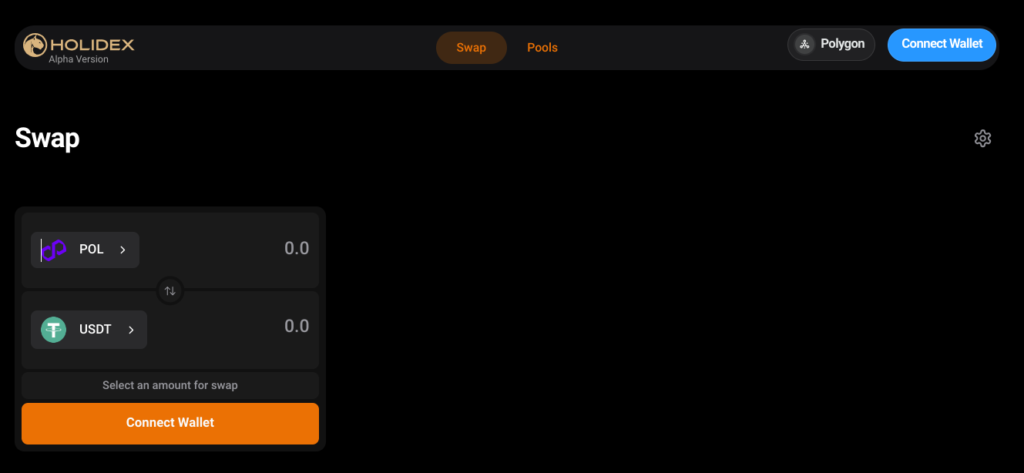
The Swap section is where you can exchange one token for another. Here’s a step-by-step guide:
- Select Tokens:
- The first line represents the token you want to swap (e.g., POL).
- The second line shows the token you’ll receive (e.g., USDT).
- Enter the Amount:
Specify the amount of the token you wish to swap. For example, let’s swap 2 POL for USDT. - Review Transaction Details:
Expand the Details section to view the transaction fee and other relevant information. - Adjust Slippage Settings:
Click the gear icon to customize slippage settings. By default, slippage is set to auto, but you can adjust it manually if needed. - Set Transaction Deadline:
Specify the time limit (in minutes) for executing the transaction. - Confirm the Swap:
Click the Swap button and confirm the transaction in your wallet.
Once confirmed, the transaction will be sent to the network. You can track its progress and view your transaction history by clicking the history icon.
Step 3: Adding Liquidity to Holidex Liquidity Pool
Liquidity pools are a key feature of decentralized exchanges, allowing users to earn passive income by providing liquidity.
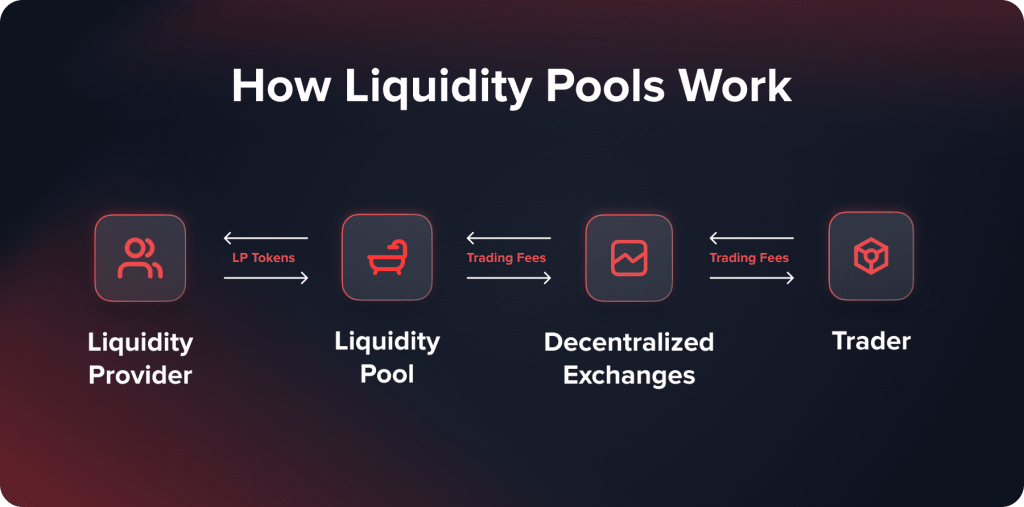
Here’s how to add liquidity on Holidex:
- Navigate to the Pools Section:
Click on the Pools tab to access the Holidex liquidity pool. - Create a New Position:
If you don’t have an existing position, click Create Position. - Set Price Range:
Specify the minimum and maximum price range for your liquidity. You can use presets like Narrow, Common, Wide, or Full to simplify the process. - Add Tokens:
Enter the amount of tokens you want to add to the pool. For example, if you add POL and USDT, the system will automatically calculate the required amounts for both tokens. - Approve and Confirm:
Click Approve USDT (or the relevant token) and confirm the transaction in your wallet. Once approved, click Create Position and confirm again. - Monitor Your Position:
After creating your position, you can view details like liquidity, percentage share, and earned commissions.
Step 4: Managing Your Holidex Liquidity Position
Once you’ve added liquidity, you can manage your position in the following ways:
- Collect Fees:
When you’ve earned commissions, click the Collect Fees button to withdraw them. - Remove Liquidity:
If you want to withdraw your funds, click Remove Liquidity and specify the amount you wish to withdraw. - Add More Liquidity:
To increase your position, click Add Liquidity and follow the steps above.
Tips for Using Holidex
- Double-Check Transactions:
Always review transaction details before confirming to avoid errors. - Monitor Slippage:
Adjust slippage settings based on market conditions to ensure your transactions go through smoothly. - Stay Updated:
Holidex is currently in its alpha version, so stay tuned for updates and improvements. - Reach Out for Support:
If you encounter any issues, don’t hesitate to contact Holidex’s technical support team.
Conclusion: Holidex Token Swap and Liquidity Pool Explained
Holidex is a powerful decentralized exchange that empowers users to swap tokens and participate in Holidex liquidity pool with ease. While the platform is still in its alpha stage, it offers a glimpse into the future of decentralized finance (DeFi). By following this guide, you’ll be well-equipped to navigate Holidex and take advantage of its features.
Have you tried Holidex yet? Share your experiences or ask questions in the comments below! And don’t forget to subscribe for more crypto tutorials and updates.
Discover more from Digital Wealth Guru
Subscribe to get the latest posts sent to your email.





Comments