Embarking on creating your first website can be daunting, but fear not! Whether you’re bursting with an exciting site concept or a creative project, hosting a website can be surprisingly simple.
This article is your comprehensive guide on Web Hosting, aimed at breaking down the complexities and helping you navigate the path to your online platform, allowing you to scale from a Novice to a Pro Webmaster level.
Easy Guide to Hosting Your First Website: From Idea to Online Presence
This guide is designed to take you from your website idea to a live online presence, even if you have no prior experience with coding or web development. We’ll break down the technical aspects into easy-to-understand steps, assuming you have a basic understanding of the internet and some general computer skills.
Here’s what we’ll assume you already know:
Internet Basics:
- You’re comfortable browsing websites using a web browser like Chrome, Firefox, or Safari.
- You know how to use search engines like Google or Bing to find information online.
Website Fundamentals:
- You understand that a website is a collection of web pages that people can access on the internet.
- Websites can serve various purposes, such as showcasing a business, sharing your passions through a blog, presenting your work in an online portfolio, or even selling products through an online store.
General Computer Skills:
- You can follow instructions and navigate through online tools and menus.
- You’re familiar with basic computer tasks like creating folders and uploading files.
Terminology (We’ll explain further, but a little head’s up):
- You might have heard terms like “domain name,” “web hosting,” and “content management system” (CMS). Don’t worry, we’ll explain these concepts clearly in the guide.
This guide will focus on providing clear, step-by-step instructions with helpful visuals to make the process as smooth as possible. Even without any coding knowledge, you’ll be able to build and launch your website in no time!
Choosing a Domain Name: Your Website’s Identity on the Web
Congratulations on taking the first step towards building your online presence! A crucial element of your website is the domain name – it’s the address people will type in their browsers to find you. Think of it as your prime piece of real estate on the vast internet. So, how do you pick the perfect domain name? Here are some key points to consider:
1. Keep it Short, Catchy, and Memorable:
- Aim for a name that’s easy to spell, pronounce, and remember. Ideally, it should be under 15 characters.
- Avoid hyphens, numbers, and underscores, as they can make it harder to type and remember.
- If your business name is long, consider using an abbreviation or a shorter, catchier variation.
2. Make it Relevant to Your Website:
- The domain name should give visitors a clue about what your website is about.
- For example, if you’re a bakery, using “deliciousdesserts.com” would be more relevant than “[invalid URL removed]”.
3. Uniqueness is Key:
- Conduct a domain name search on a domain registrar’s website to ensure the name you want is available.
- Consider using a domain name generator tool to spark ideas for unique and creative names related to your website’s theme.
4. Choose the Right Domain Extension:
- The most popular domain extension is “.com”, but there are many others available, like “.org” for non-profits, “.net” for tech-related websites, or country-specific extensions like “.co.uk” for the United Kingdom.
- While “.com” is widely recognized, a relevant alternative extension can sometimes be more memorable or add a touch of personality.
5. Availability on Social Media Platforms:
- Check if the username matching your desired domain name is available on popular social media platforms like Facebook, Twitter, and Instagram.
- Having a consistent brand identity across all platforms creates a more professional and memorable experience for visitors.
Bonus Tip: Think Long-Term!
- Choose a domain name that has the potential to grow with your website.
- Avoid names that are too specific to a current product or service, as you might expand your offerings in the future.
Remember: Your domain name is a valuable asset. Take your time, brainstorm some ideas, and choose a name that reflects your brand and resonates with your target audience. By following these tips, you’ll be well on your way to securing the perfect online identity for your website!
Picking a Web Hosting Provider: Your Reliable Launchpad to the Online World

Congratulations! You’ve got a fantastic website idea, and now it’s time to bring it to life. But before visitors can flock to your online creation, you need a place to store it – that’s where web hosting comes in. Think of it as the prime real estate of the internet, where your website files reside and are accessible to the world.
Choosing the right web hosting provider can feel overwhelming, but fear not! Here’s a breakdown of key factors to consider, ensuring you find a reliable and affordable home for your website:
1. Know Your Needs:
- Website Traffic: Are you expecting a bustling online store or a cozy personal blog? The anticipated traffic volume will influence the hosting plan you choose.
- Features: Do you need functionalities like email hosting, databases, or e-commerce tools? Make sure your chosen plan offers the features you require.
- Technical Expertise: Are you comfortable managing website files directly, or would a user-friendly platform be more suitable?
2. Reliability is King:
- Uptime Guarantee: Aim for a provider with a high uptime guarantee (ideally 99.9% or higher). This ensures your website is accessible to visitors most of the time.
- Server Performance: Consistent loading speeds are crucial. Look for providers known for reliable and fast servers.
- Backup Options: What happens if something goes wrong? Choose a provider that offers regular backups to restore your website data in case of emergencies.
3. Unveiling the Cost Factor:
- Shared vs. Dedicated Hosting: Shared hosting is affordable and ideal for beginners, while dedicated hosting offers more power and control for high-traffic websites (comes at a higher cost).
- Plan Features: Compare pricing based on the features included in each plan. Don’t pay for extras you won’t use.
- Renewal Rates: Be mindful of introductory pricing offers. Check the renewal rates to avoid surprises down the line.
4. Customer Support is Your Ally:
- Availability: Does the provider offer 24/7 customer support via phone, email, or live chat? Ensure you have access to help whenever needed.
- Response Times: Fast and friendly customer support can make a world of difference when you encounter technical difficulties.
5. Digging Deeper: Reviews and Recommendations:
- Read Online Reviews: Check trusted review websites to see what other customers are saying about potential providers.
- Ask Around: If you know website owners, seek their recommendations based on their experiences.
Bonus Tip! Don’t be afraid to contact the web hosting provider directly. Most offer sales teams happy to answer your questions and guide you towards the best plan for your needs.
By considering these factors, you’ll be well-equipped to choose a reliable and affordable web hosting provider. Remember, your website is your online identity, so pick a foundation that can support its growth and success!
Overcoming the Web Hosting Hurdle
Greetings, aspiring digital creators! The website hosting world might appear overwhelming initially, but take a deep breath, for I’m here to guide you through this process. I’m De Digital Wealth Guru, and I’ve spent ample time exploring various hosting services as part of Website Planet.
In this guide, I’ll provide a roadmap to hosting your first website. You’ll discover the different approaches, gain insights into top hosting choices, and acquire valuable tips.
So, let’s dive in and transform your brilliant website idea into reality.
What Is Web Hosting?
In the vast landscape of the internet, web hosting is the foundation that allows websites to flourish and connect with audiences across the globe. If you’re new to web hosting, fear not – this article is here to shed light on this integral aspect of the digital world.
Defining Web Hosting: The Digital Home for Your Website
Imagine your website as a digital storefront, complete with products, content, and information. Now, think of web hosting as the virtual space accommodating this digital content.
Web hosting is basically a service that companies offer to people and businesses so they can make their websites available on the Internet.
The Concept of Web Hosting
When a user types your website’s domain name into their browser, a series of complex processes unfold. These processes involve servers powerful computers designed to store and deliver your website’s content.
Web hosting companies own and operate these servers, ensuring that your website’s files – from text and images to videos and interactive elements – are stored securely and made available to users whenever they visit your site.
Varieties of Web Hosting
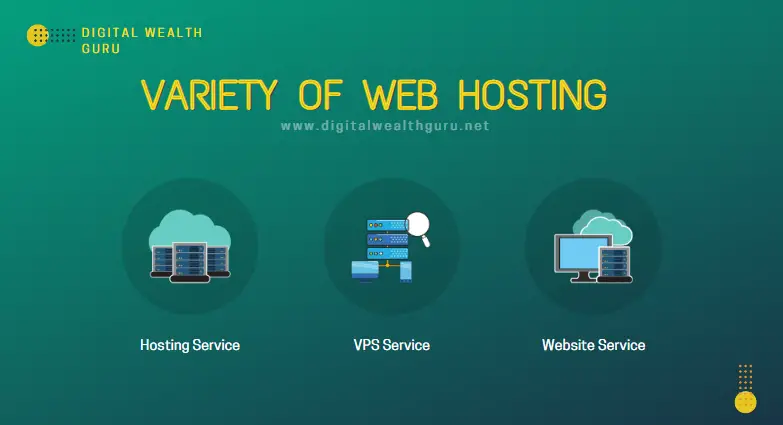
Web hosting comes in various forms, each catering to different needs and requirements. Some common types include:
- Shared Hosting: Multiple websites use the same server’s resources. Smaller blogs with less traffic can use this.
- VPS (Virtual Private Server) Hosting: A server is divided into virtual compartments, each hosting a separate website. VPS offers more control and resources than shared hosting.
- Dedicated Hosting: An entire server is allocated to a single website. This option provides maximum control, performance, and security.
- Cloud Hosting: Hosting a website on multiple computers makes it highly available and easy to expand.
- Reseller Hosting: Individuals or businesses can sell hosting plans to others using their allocated server space.
Key Benefits of Web Hosting
- Global Accessibility: Web hosting lets anyone with an internet connection see your website, no matter where they are in the world.
- Custom Domain: Web hosting allows you to use a personalized domain name that reflects your brand or identity.
- Data Storage: Hosting companies provide ample storage space for all your website’s files, ensuring optimal performance.
- Scalability: As your website grows, hosting plans can be upgraded to accommodate increasing traffic and demands.
- Technical Support: Most hosting providers offer customer support for technical issues and troubleshooting.
Which Hosting is Best For Entry Level Website Hosting?
Selecting a web hosting provider requires careful consideration of your website’s size, traffic expectations, technical expertise, and budget.
Reading this article till the end and comparing the hosting options highlighted will help you find the best fit for your needs.
Methods of Web Hosting

Before we delve into the nitty-gritty, let’s discuss the various avenues you can take when hosting a website. These methods offer diverse levels of complexity, making them suitable for different skill levels:
- Using a Web Hosting Service: This method involves partnering with a hosting company to store your website on their servers. It strikes a mix between being flexible and being easy to use, making it great for both new and experienced developers.
- Leveraging an All-In-One Website Builder: If you prefer an effortless approach, all-in-one website builders are your best bet. These platforms encompass hosting and site creation, making them perfect for those averse to technical complexities.
- Running a Local Server: Reserved for the tech-savvy, this advanced option entails purchasing and operating your server from home, granting you unparalleled control over your website.
Now that you understand the paths ahead let’s explore each method in detail, ensuring you’re equipped to make the right decision for your website’s needs.
Web Hosting Method 1: Web Hosting Service

To establish your online presence, web hosting is essential. It’s akin to renting a space on the internet where your site’s content resides, accessible to visitors worldwide.
Selecting a reliable web hosting service is the initial step, and I’m here to guide you through the process.
Step 1 – Choose the Right Type of Hosting
Before you start, identify the type of web hosting that suits your needs. Standard options include shared hosting, managed WordPress hosting, Virtual Private Servers (VPS), and dedicated servers.
For beginners, shared hosting and managed WordPress hosting are recommended due to their user-friendliness.
Step 2 – Pick a Good Web Hosting Service
Choosing the right web host is crucial, impacting your website’s performance and reliability.
To ensure an informed decision, rely on resources like Website Planet that impartially assess and compare hosting providers.
Top picks include Hostinger, A2 Hosting, InMotion Hosting, and FastComet, each catering to different needs.
Step 3 – Buy the Right Web Hosting Plan
After selecting a web host, pick the appropriate hosting plan that aligns with your website’s requirements.
Consider factors such as storage space, performance, and scalability.
Choose the plan that meets your needs now and leaves room for growth in the future.
Step 4 – Buy a Domain
Getting a domain name is very important because it is your website’s online address. Many hosting plans include a free domain for the first year.
If you need to register a new domain, your hosting provider can assist you during the checkout process.
Step 5 – Log Into Your Control Panel
Access your hosting control panel, a hub that facilitates website management. This is where you’ll configure settings, create email accounts, and initiate the website-building process.
Step 6 – Install WordPress (Or Another CMS)
Most hosts offer one-click installations for content management systems (CMS) like WordPress. Installing a CMS enables you to design, manage, and customize your website with ease.
Choose WordPress for its popularity and support from hosting providers.
Step 7 – Build Your Website
You can begin building your website immediately after your CMS is set up. WordPress has an easy-to-use website dashboard where you can add content, make pages, and choose styles.
Use page builder plugins like Elementor or Divi to simplify the design process.
Step 8 – Optimize Your Website and Hosting (Optional)
As your website grows, optimize it to ensure optimal performance.
Tips include optimizing images, implementing caching, embedding videos externally, and utilizing a Content Delivery Network (CDN) to enhance loading speeds.
Web Hosting Method 2: All-in-One Website Builder

The world of website creation has evolved, and all-in-one website builders have emerged as a dynamic solution.
Imagine the convenience of a single platform where you can design, host, and launch your website with few clicks – that’s the promise of all-in-one website builders.
All-in-One Website Builders: Simplifying the Process
The concept of an all-in-one website builder encapsulates a comprehensive approach to website creation. Hosting is seamlessly integrated into the platform, erasing the need for external hosting services.
Instead of dealing with intricate hosting setups, you can focus solely on crafting your website.
Select a template, personalize it to suit your needs, and your online presence is ready to shine!
Step 1: Choose the Right All-in-One Website Builder
The choice of an all-in-one website builder significantly impacts your website-building journey. The variety and quality of templates, customization options, and hosting features vary widely among different platforms.
To provide unbiased guidance, we rigorously test numerous site builders. Here are our recommended options:
1. Wix – Unleash Your Creativity with a Wide Range of Templates
Wix boasts an extensive collection of over 500 professional templates that cater to diverse needs. Every template is fully customizable, empowering you to shape your website according to your vision.
Wix also offers a forever-free plan, allowing you to explore and design without limitations.
2. SITE123 – Effortless Site Design with Excellent Live Chat Support
SITE123 streamlines site design through its user-friendly “point-and-click” editing approach. While not as freeform as other builders, its alignment ensures a clean and polished look.
The platform’s responsive live-chat support provides quick solutions to any queries.
3. Squarespace – Aesthetic Excellence and Advanced Online Store Features
Squarespace stands out for its visually captivating templates and deep online store integration.
Whether you’re creating a portfolio or an online store, Squarespace’s customization options and online store features cater to your unique needs.
4. WordPress.com – Intuitive Text Editor with Extensive Plugin Options
For bloggers and content creators, WordPress.com offers an intuitive text editor that simplifies crafting visually pleasing posts.
With access to tens of thousands of plugins, you can enhance your website’s functionality and customization.
Step 2: Select the Ideal Plan
All-in-one website builders typically offer a range of plans, each tailored to varying needs. Consider your website’s objectives and select a plan accordingly.
Many builders provide free plans or trials, enabling you to evaluate their suitability before committing.
Step 3: Log In to the Dashboard
Upon choosing a plan, you’ll access the website builder’s dashboard. Logging in is straightforward, requiring only your username and password.
Unlike hosting, you won’t need to log in to multiple apps, simplifying the process.
Step 4: Choose a Template and Begin Crafting
Selecting a template marks the beginning of your website-building journey. While you can start from scratch, customizing a template aligned with your website’s theme saves time and effort.
Most builders offer a variety of templates catering to personal blogs, businesses, and more.
Step 5: Optional – Connect Your Domain
To enhance professionalism and branding, connecting a custom domain is essential. While free plans feature the site builder’s name as part of your domain, upgrading to a custom domain reinforces your online identity.
As you navigate the landscape of website creation, all-in-one website builders are versatile tools that simplify the process. By seamlessly integrating hosting and design features, these platforms empower you to bring your digital vision to life.
From selecting the right builder to customizing templates and connecting domains, the process becomes intuitive and accessible. Embrace the power of all-in-one website builders and embark on your journey to an impactful online presence.
Web Hosting Method 3: Using Local Server for Web Hosting
In the realm of web hosting, there’s a lesser-known avenue that offers complete control over your hosting environment – setting up a local server. This method configures your hardware as a server, granting you unparalleled authority over your hosting infrastructure.
Because it’s so complicated, this method isn’t suitable for beginners, but it can be worth it for people who want to have the most control.
In this guide, we’ll delve into the process of running a local server, step by step, from selecting the proper hardware to optimizing your server’s performance.
Step 1: Hardware Selection
Starting on the path of local server hosting demands hardware capable of robust performance. While it’s conceivable to run a server from your personal computer, dedicated resources are a must.
For simple, low-traffic sites, repurposing a spare computer could suffice. However, this comes with limitations – computer specs significantly affect performance, and the setup might be noisy and unreliable.
Step 2: Web Server Installation
Alternatively, investing in a separate server may offer a smoother experience, albeit at a higher cost.
Installing a web server is paramount once you have your hardware in place. The choice of web server depends on your operating system, with Linux being a preferred choice due to compatibility. Apache and NGINX are commonly opted for.
The installation process often involves command-line execution, and web server documentation typically provides precise instructions.
Step 3: Control Panel Consideration
While not mandatory, a control panel can streamline day-to-day server management. Without a control panel, command-line proficiency is essential for managing various aspects of your site.
Many control panel options exist, with cPanel being a reliable choice for Linux users and Plesk catering to Windows enthusiasts. It’s important to note that control panels are not free, as licensing fees apply.
Step 4: Acquiring a Static IP
To host your server effectively, a static IP is a necessity. Most internet service providers (ISPs) offer dynamic IPs by default, which is inadequate for web hosting.
Acquiring a static IP entails contacting your ISP and requesting the upgrade, often accompanied by additional fees. Upgrading your internet plan might also be necessary.
Step 5: Bandwidth Assessment
Standard internet plans lack the bandwidth required for hosting a server. Server operation mandates considerably more bandwidth than residential plans provide.
Contacting your ISP to inquire about specialized plans accommodating server needs is crucial.
Step 6: Server Security
Unlike conventional web hosts offering security measures, securing a local server rests on your shoulders. While seasoned users might handle this task, novice users are advised to opt for third-party security solutions.
Investing in a reputable security solution, though potentially costly, ensures protection against vulnerabilities that could compromise your server.
Step 7: Performance Optimization
Enhancing your server’s performance is a crucial step. Optimization encompasses fine-tuning your databases and web server, as well as implementing effective caching solutions for content.
Exploring a content delivery network (CDN), such as Cloudflare, can further boost performance. Once these optimizations are in place, your server will be primed to host your site effectively.
Embracing the local server route for web hosting grants unparalleled control, but it’s not a journey for the faint-hearted. Armed with the insights this guide provides, you possess a solid foundation to embark on this path.
However, remember that established hosting providers and website builders are equipped with tutorials, guides, and support services that can be invaluable when hurdles arise.
Should you need a more accessible approach to web hosting, consider exploring renowned platforms such as Hostinger, Wix, and Kinsta for your diverse needs.
Regardless of your path, be it a local server or a trusted hosting provider, your journey toward web hosting prowess begins here.
Pro Tip: Managed WordPress Hosting for Simplified Management
If you’re new to website creation, managed WordPress hosting offers an easier route. Platforms like Kinsta, A2 Hosting, and InMotion Hosting simplify WordPress management, making it more accessible and manageable for beginners.
Hosting Your Website Without Coding: The Magic of Content Management Systems (CMS)
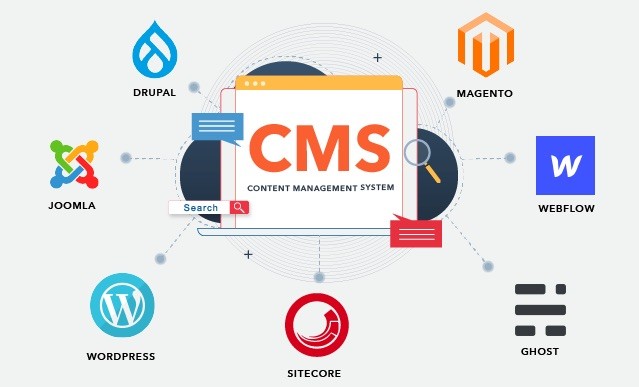
Imagine creating a beautiful and functional website without writing a single line of code! That’s the power of Content Management Systems (CMS) like WordPress.
Think of a CMS as a user-friendly toolbox for building and managing your website’s content. It provides a visual interface where you can add text, images, videos, and other elements with just a few clicks, drag-and-drop actions, and simple editing tools.
Here’s how a CMS can simplify your website creation journey:
- No coding required: Unlike traditional website development, a CMS eliminates the need for coding knowledge. You can focus on creating engaging content without getting bogged down in technical details.
- Easy content creation: Adding text, images, and other elements is as simple as using a word processor. You can edit, update, and rearrange content effortlessly.
- Drag-and-drop functionality: Many CMS platforms offer drag-and-drop features, allowing you to visually design your website layout without any coding.
- Pre-built templates: Most CMS platforms come with a variety of pre-designed templates for different website types (blogs, portfolios, businesses). You can choose a template that suits your needs and customize it further.
- Extensions and plugins: A vast library of extensions and plugins is available for most popular CMS platforms. These add-on features can extend your website’s functionality, allowing you to add contact forms, galleries, online stores, and more.
- User-friendly interface: A CMS provides a user-friendly interface that’s easy to navigate, even for beginners with no prior website experience.
Here are some popular CMS options to consider:
- WordPress: The most widely used CMS globally, known for its ease of use, flexibility, and vast plugin library.
- Wix: A user-friendly website builder with drag-and-drop functionality and built-in hosting (optional).
- Squarespace: Another popular website builder offering beautiful templates and easy content management.
- Weebly: A user-friendly platform with website building tools and integrated marketing features.
Is a CMS right for you?
A CMS is an excellent option if:
- You’re a beginner with no coding experience.
- You want a user-friendly way to build and manage your website content.
- You don’t require a highly customized website design.
The decision to use a CMS depends on your website’s specific needs and your comfort level with technology. If you have more complex website requirements or prefer complete design control, you might consider working with a web developer.
Remember: This guide provides a basic overview of CMS. If you choose to use a CMS platform, there are lots of resources available on our blog’s “Web Hosting” Category to help you get started, including tutorials, documentation, and online communities.
Conclusion
And there you have it, a comprehensive understanding of web hosting, its essence, and its role in bringing your online endeavors to life. As you navigate the exciting realm of websites, blogs, portfolios, and beyond, remember that web hosting is the foundation on which your digital presence thrives.
Until next time, fellow Internet explorers – keep learning, creating, and expanding your online horizons. See you in the following article!
FAQs
1. What is web hosting?
Web hosting is a service that allows you to store your website’s files (code, images, text) on a special computer called a server. This server is constantly connected to the internet, making your website accessible to anyone with an internet connection.
2. Why do I need web hosting?
If you want to create a website and have it visible online, you need web hosting. Without it, your website files would be sitting on your personal computer, inaccessible to the world.
3. What are the different types of web hosting?
There are several main types of web hosting, each with its own advantages and disadvantages:
- Shared Hosting: Affordable option where multiple websites share resources on a single server. Good for beginners with low-traffic websites.
- Virtual Private Server (VPS): Offers more dedicated resources than shared hosting, ideal for websites with growing traffic or specific software needs.
- Dedicated Hosting: Provides an entire server for your website, offering maximum control and performance. Best for high-traffic websites or mission-critical applications.
- Cloud Hosting: Scales resources up or down based on your website’s traffic, offering flexibility and cost-efficiency.
4. What factors should I consider when choosing a web hosting provider?
- Needs: Consider your website’s traffic, storage requirements, and desired features (e.g., email hosting, databases).
- Budget: Web hosting prices vary depending on the type and features offered.
- Uptime: Look for a provider with a high uptime guarantee (percentage of time your website is online).
- Security: Choose a provider with robust security measures to protect your website and data.
- Customer Support: Ensure the provider offers reliable and responsive customer support in case you encounter any issues.
5. How much does web hosting cost?
Shared hosting plans can start as low as a few dollars per month, while dedicated servers can cost hundreds of dollars per month. The cost depends on the type of plan, features, and resources you need.
6. Can I create a website for free?
There are free web hosting services available, but they often come with limitations on storage, bandwidth, customization, and advertising. For a professional-looking and reliable website, paid web hosting is generally recommended.
7. What are some popular web hosting providers?
Some well-known web hosting providers include Bluehost, HostGator, SiteGround, DreamHost, and Namecheap. Each offers various plans and features, so research to find the best fit for your needs.
8. How do I set up my website after getting web hosting?
Most web hosting providers offer user-friendly tools like cPanel to manage your website files and databases. You can also install content management systems (CMS) like WordPress to easily build and manage your website content.
9. What are some resources for learning more about web hosting?
Many web hosting providers offer tutorials and guides on their websites. You can also find a wealth of information online through articles, video tutorials, and web hosting comparison websites.
10. I’m still confused. Can you help me choose a web hosting plan?
Absolutely! If you provide more details about your website’s purpose, size, and budget, I can offer more specific recommendations on choosing the right web hosting plan for you.
Discover more from Digital Wealth Guru
Subscribe to get the latest posts sent to your email.




Comments